

Understanding Thermostat Sensors and Why They Get Dirty
To clean a thermostat sensor, turn off power at the circuit breaker, gently remove the faceplate, and use compressed air or a soft dry brush to clear accumulated dust from the thermistor or mechanical contact points. If persistent temperature discrepancies or complex low-voltage wiring issues remain, scheduling a professional thermostat sensor cleaning service ensures safe recalibration without risking control board damage.
Every thermostat relies on an internal sensor to sample the ambient air in your living space. Whether your system uses a vintage mechanical coil or a modern digital microprocessor, that sensor acts as the brain of your climate control. When dust settles inside the thermostat housing, it forms a layer of thermal insulation over the sensing element. Instead of reading the true room air, the sensor measures the temperature trapped beneath the dust blanket.
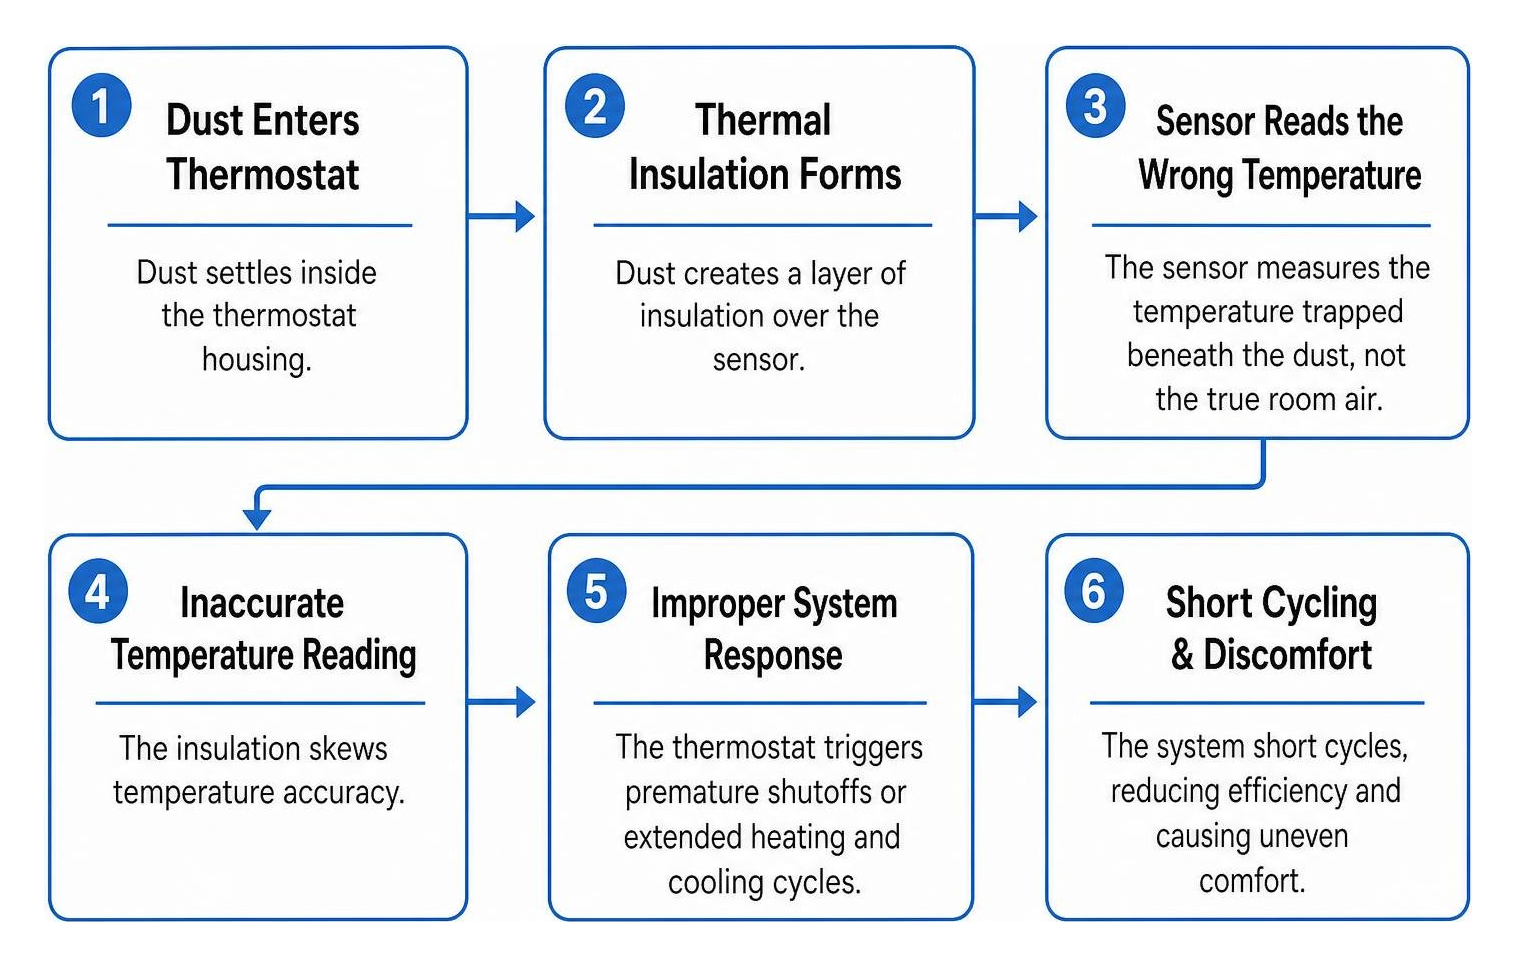
This insulation skews temperature accuracy, triggering premature shutoffs or extended heating and cooling cycles. Most heating and cooling systems operate within a standard 2-to-3-degree operational buffer. However, when dust accumulation creates a temperature discrepancy exceeding 5 degrees, your equipment begins to struggle. Routine AC Maintenance helps catch these discrepancies early, ensuring your indoor comfort remains steady throughout the year. Following the established steps in How to Clean Thermostat Sensor | 6 Easy Steps (2026) can help you identify whether simple surface dust or deeper calibration issues are affecting your climate control.
How Dust and Buildup Skew Temperature Accuracy
A dust barrier slows the heat exchange between your room air and the sensor. When your air conditioner turns on, the insulated sensor takes significantly longer to register the dropping room temperature. This delay inflates runtime, forcing the compressor and blower motor to run far longer than necessary.
Conversely, trapped heat inside the housing can fool the thermostat into registering false readings, prompting short cycling where the system turns on and off rapidly. This erratic behavior wastes energy, accelerates component wear, and leaves your living areas unevenly heated or cooled.
Electromechanical Bimetal Coils vs. Digital Thermistors
Thermostats generally fall into two categories, each using a distinct sensing mechanism:
- Electromechanical Thermostats: Older non-digital units feature a bimetal coil made from two bonded metals that expand and contract at different rates as temperatures shift. As the coil moves, it tilts a mercury switch or brings physical contact points together to complete an electrical circuit. Dust, pet dander, and oxidation on these switch contacts block electrical current, while grime on the bimetal strip restricts physical movement. Mechanical units also require perfectly level mounting on the wall; even a slight tilt alters the physical balance of the coil.
- Digital and Smart Thermostats: Modern units utilize solid-state thermistors—delicate electronic resistors whose electrical resistance changes predictably with temperature. Digital thermistors do not have moving parts or open contact plates, but their exposed pins and micro-circuitry remain vulnerable to static electricity, airborne grease, and fine particulate buildup.
Step-by-Step Guide: How to Clean Your Thermostat Sensor
Cleaning a thermostat sensor requires patience and a light touch. Forcing plastic latches or using improper tools can damage delicate circuit traces or distort mechanical coils.
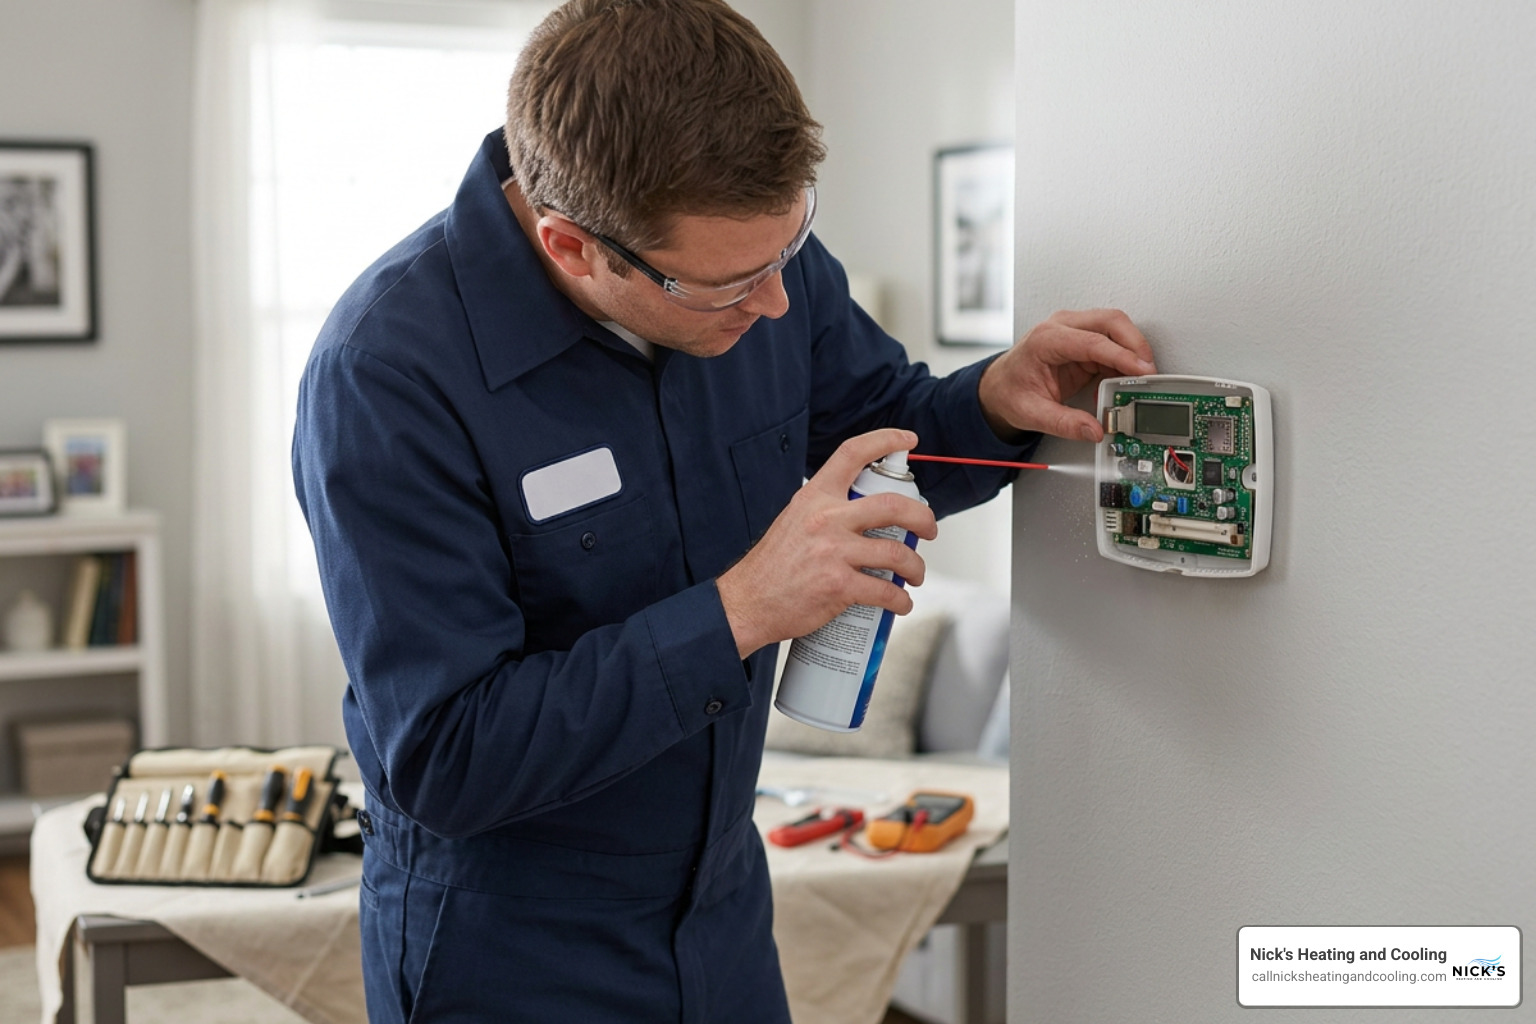
Essential Tools for Safe Sensor Cleaning
Before opening the thermostat housing, gather these basic, non-abrasive supplies:
- A clean, soft-bristle makeup brush or small artist paintbrush
- A can of electronics-grade compressed air
- Isopropyl alcohol (90% or higher purity)
- High-quality cotton swabs
- A calibrated digital reference thermometer
- A small dish or magnetic tray to hold mounting screws
Detailed Sensor Cleaning Procedure
Follow this systematic sequence to clean internal sensing components safely:
- Disconnect Electrical Power: Switch off the circuit breakers controlling your furnace, air handler, and air conditioner. Never work inside a live thermostat.
- Remove the Faceplate: Carefully pull the front cover away from the wall sub-base. Most modern units unclip with gentle, straight pulling pressure, while electromechanical models may require unscrewing small housing fasteners.
- Inspect the Sensor: Locate the sensing element. On an electromechanical unit, look for the coiled metal strip and contact points. On a digital model, locate the small bead-like thermistor protruding from the circuit board.
- Dry Dust the Components: Hold your can of compressed air upright at least six inches away and apply short, controlled bursts to blow loose dust out of the housing. Use your dry, soft-bristle brush to sweep away remaining lint and pet hair.
- Clean Contact Points (Mechanical Only): For electromechanical contact points, slip a clean piece of heavy paper or a crisp dollar bill between the closed contacts and pull it through gently to wipe away oxidation. If stubborn residue persists on switch contacts, moisten a cotton swab with a drop of isopropyl alcohol, clean the metal contact surface, and let it dry completely.
- Reassemble and Level: Snap the housing back onto the wall plate. For mechanical units, verify the baseplate is level using a bubble level.
- Restore Power and Verify: Switch the breaker back on. Place your independent reference thermometer directly beside the thermostat for 15 minutes to verify temperature accuracy.
Common Mistakes to Avoid During Cleaning
Avoid these common pitfalls to prevent accidental damage during maintenance:
- Touching Sensors with Bare Fingers: Skin oils leave an invisible residue on thermistors and bimetal strips that attracts dust and alters temperature sensitivity.
- Spraying Aerosols Directly Inside: Never spray liquid cleaners, solvents, or water directly onto internal electronics or wiring terminals.
- Bending the Bimetal Coil: Forcing or bending a mechanical coil ruins its factory calibration permanently.
- Reinstalling an Unlevel Housing: Mounting an electromechanical thermostat unevenly skews its mechanical calibration and cycle timing.
Key Signs Your Sensor Needs Cleaning or Replacement
A dirty thermostat sensor does not just cause minor temperature swings; it directly degrades the operational efficiency of your entire HVAC system. Routine checkups outlined in Why Birmingham Homeowners Need Regular HVAC Maintenance can help you spot early performance drops before they lead to expensive utility spikes.
According to the U.S. Department of Energy, adjusting your thermostat 7 to 10 degrees Fahrenheit from its normal setting for 8 hours a day can save up to 10 percent annually on heating and cooling costs. However, when a dust-coated sensor creates an artificial 5-degree reading offset, you lose those savings while your system runs inefficiently.
Temperature Drift and HVAC Short Cycling
Sensor drift occurs when dirt buildup causes gradual calibration loss. You may notice hot and cold spots across living areas despite the thermostat displaying a steady reading. Over time, delayed response times force equipment to cycle on and off in rapid bursts. This short cycling subjects the compressor and fan motor to unnecessary wear, increasing the risk of premature system breakdowns.
Cleaning vs. Sensor Replacement Criteria
While regular cleaning resolves most temperature inaccuracies, aging hardware eventually reaches the end of its serviceable life. The typical lifespan of a Honeywell thermostat ranges from 10 to 20 years depending on operating conditions and maintenance frequency. If your hardware is physically corroded or wiring has degraded, consult our Thermostat Remote Sensor Replacement Guide for Perfect Home Temperatures to explore replacement options.
| Symptom / Condition | Recommended Action | Underlying Reason |
|---|---|---|
| Minor temperature discrepancy (2–4°F) | Clean Sensor | Light dust insulation over the sensing element |
| Heavy dust/lint visible inside housing | Clean Sensor | Physical debris blocking normal airflow around the thermistor |
| Persistent 5°F+ offset after cleaning | Recalibrate or Replace | Sensor component degradation or internal thermistor drift |
| Corroded terminal blocks or frayed wires | Replace Component/Unit | Irreversible electrical resistance changes and fire safety risks |
| Unit age exceeds 15–20 years | Replace Thermostat | Hardware has surpassed its reliable design lifecycle |
| Unresponsive buttons / broken LCD display | Replace Thermostat | Internal microprocessor or control board failure |
When to Hire a Professional Thermostat Sensor Cleaning Service
While basic exterior dusting is an easy DIY task, internal electrical components require professional care. Homeowners looking to protect their comfort during peak summer heat can Keep Your Cool with Top HVAC Services in Hoover AL by scheduling precision diagnostics with certified technicians.
DIY Maintenance vs. Professional Thermostat Sensor Cleaning Service
Working inside a thermostat involves navigating low-voltage wiring, delicate circuit pins, and dedicated 24V common wire (C-wire) lines. An accidental short between the R-wire and C-wire can blow the low-voltage fuse on your furnace or fry the main air handler control board, leading to repairs that easily exceed $400.
Complex heat pump setups utilizing O/B reversing valve terminals are particularly vulnerable to wiring errors. Working with The Certified HVAC Contractor Your Shield Against Shady Services ensures that electrical connections, line voltages, and software calibration are handled safely without risking damage to expensive HVAC equipment.
What to Expect During a Professional Thermostat Sensor Cleaning Service
When an expert technician performs a thermostat sensor inspection and maintenance visit, the service includes:
- Precision Recalibration: Testing sensor output against calibrated field instruments and adjusting digital offset settings.
- Electrical Diagnostics: Measuring terminal voltage, verifying steady 24V power supply, and checking for power-stealing anomalies.
- Control Board & Wiring Inspection: Tightening terminal screws, checking for wire oxidation, and verifying heat pump reversing valve configurations.
- Airflow & Placement Analysis: Checking the wall opening behind the sub-base for drafts and verifying that the unit is isolated from radiant heat sources.
- Multi-Mode Operational Run: Cycling the system through heating, cooling, and fan-only modes to confirm smooth operation across all stages.
Frequently Asked Questions About Thermostat Sensor Maintenance
How often should a thermostat sensor be cleaned?
A thermostat sensor should be checked and gently cleaned every 6 to 12 months. Homes with indoor pets, active remodeling projects, or high regional pollen levels benefit from a seasonal inspection every 3 to 6 months to prevent airflow dust from blanketing internal electronics.
Why are temperature readings still inaccurate after cleaning the sensor?
If temperature readings remain inaccurate after a thorough cleaning, the issue is often caused by external factors. Check for unsealed wall cavities behind the baseplate that allow attic or wall drafts to blow directly on the sensor, nearby heat-generating appliances, direct sunlight exposure, dying backup batteries, or a failing internal thermistor that requires replacement.
Can a dirty thermostat sensor increase heating and cooling bills?
Yes. A dirty sensor creates false temperature readings that cause extended HVAC runtimes and inefficient short cycling. This constant over-cycling can increase monthly heating and cooling energy consumption by 8 to 15 percent while accelerating wear on your blower motor and compressor.
Conclusion
Proactive thermostat care ensures your heating and cooling equipment runs smoothly, maintains balanced indoor temperatures, and prevents unnecessary utility expenses. Whether your system needs basic sensor dusting or precision electrical recalibration, quality maintenance protects your HVAC investment over the long haul.
For dependable service, expert system diagnostics, and free no-obligation inspections, turn to Nick’s Heating & Cooling to keep your home comfortable in every season.
Nick’s Heating and Cooling currently services Birmingham, Hoover, Vestavia Hills, Mountain Brook, Alabaster, Chelsea, Homewood, Trussville, Pelham, and Irondale for all your HVAC and Heating needs.